How to create a cloze test exercise
Clozetesting.com supports 3 versatile question types (Fill-in-the-blanks, Dropdowns, and Drag & Drop Wordlists). You can combine all three in a single exercise. This guide explains how to create, configure, and share your activity.
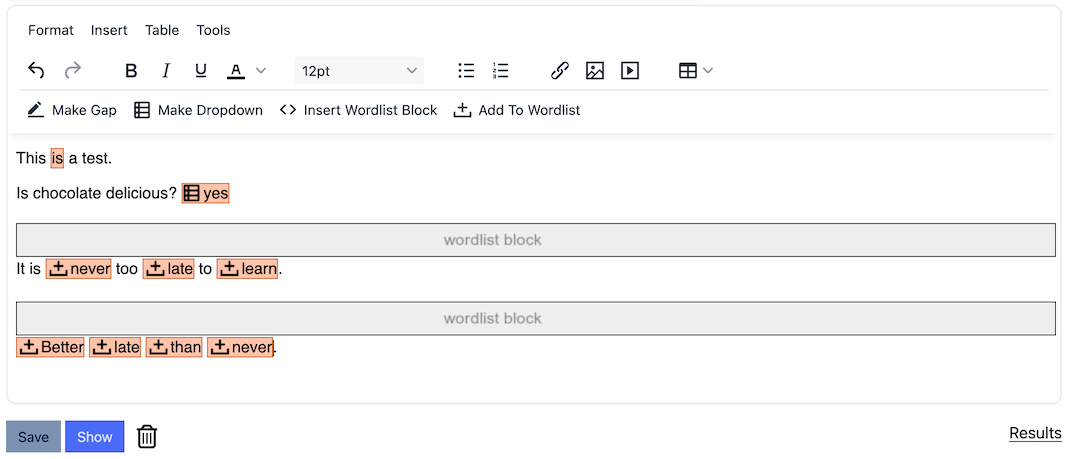
1. Creating Questions
Start by giving your exercise a title and typing (or pasting) your text into the main editor.
Fill in the blanks
Select a word or phrase with your mouse and click "Make Gap" in the toolbar. The selected text becomes a blank for students to fill in.

Dropdowns
Select the correct word and click "Make Dropdown". A dialog allows you to add incorrect options (distractors). The start of the list is always the correct answer.

Wordlists (Drag & Drop)
First, click "Insert Wordlist Block" to place a container where word options will appear. Then, highlight a word in your text and click "Add to Wordlist". These words move into the bank for students to drag and drop.
2. The Sidebar Interface
All administrative actions are located in the sidebar on the right.
Publish Panel
This is your main control center:
- Status: Toggle between "Draft" and "Published".
- Participation Mode: Choose how students access the text (e.g., Anonymous, Name required, or Google login).
- Buttons: Use "View" to preview the test as a student, and "Save"/"Update" to save your changes.
Test Settings Panel
Configure the behavior of your exercise:
- Display correction: Correct answers turn green; incorrect ones turn red.
- Show score: Display the final score (e.g. 8/10) at the end.
- Show answers: Reveal the correct answers after submission.
- Max attempts: Limit the number of tries allowed.
3. Managing Responses
To view student results, look in the Publish panel in the sidebar and click on the "Responses" link (only visible after saving).

4. Sharing your Exercise
Once your test is Published, you will see sharing options in the Publish panel:
- Copy Share Link: Providing a direct link for students.
- Share to Classroom: (Available with Google Login mode) Post directly to Google Classroom.
For embedding on your own website or exporting to PDF/XML, use the Export / Embed panel.
5. Categories
Organize your tests by using the Categories panel. You can create new categories right from the editor and assign tests to them to keep your dashboard tidy.
Questions?
Please contact us if you have any questions. We do our best to answer quickly.
Posted by Clozetesting